Discover the best techniques and tools for cutting t-shirts, from basic cuts to advanced styles. Get creative with decorative elements and learn how to style your cut t-shirts for a fashionable look.
Tools Needed for Cutting T-Shirts
When it comes to cutting t-shirts, having the right tools is essential. With the right tools, you can achieve clean and precise cuts, making your DIY project a success. In this section, we will discuss the tools you will need to get started.
Fabric Scissors
Fabric scissors are a must-have tool for cutting t-shirts. Unlike regular scissors, fabric scissors are designed with a special blade that allows for easy cutting through various types of fabrics, including t-shirt material. These scissors have a sharp and precise edge, ensuring clean cuts without fraying the fabric. The ergonomic handles provide comfort and control, making it easier to maneuver and cut through the fabric accurately.
Rotary Cutter
If you want to achieve even more precision in your t-shirt cutting, a rotary cutter is an excellent tool to have. This tool consists of a circular blade attached to a handle. The blade can be easily rolled along the fabric, allowing for smooth and accurate cuts. Rotary cutters are particularly useful when cutting straight lines or intricate patterns. They are especially handy when working with multiple layers of fabric or thicker materials.
Cutting Mat
To protect your work surface and ensure safe and accurate cutting, a cutting mat is essential. Cutting mats are made of self-healing material, which means that the surface will close up after each cut, preventing damage to the mat and ensuring a smooth cutting experience. The mat also provides a non-slip surface, keeping your fabric in place while you cut. The gridlines and measurements on the mat help you measure and align your fabric accurately, ensuring precise cuts every time.

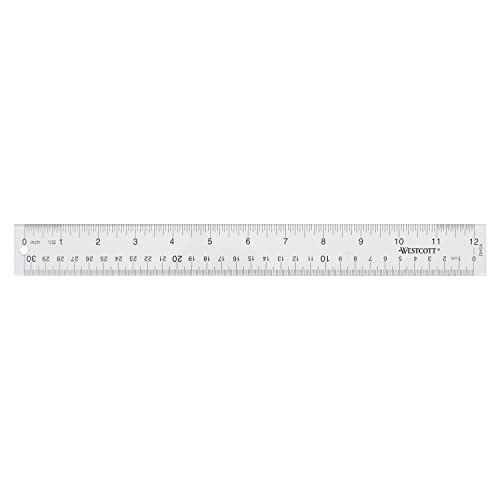
Ruler or Measuring Tape
A ruler or measuring tape is an indispensable tool when it comes to cutting t-shirts. It helps you measure and mark the cutting lines with accuracy. A ruler with clear markings and a non-slip grip is ideal for straight cuts, while a measuring tape is more flexible and can be used for measuring curved or irregular shapes. With a ruler or measuring tape, you can ensure that your cuts are consistent and symmetrical, resulting in a professional-looking finished product.
In summary, the tools mentioned above are essential for cutting t-shirts effectively. Fabric scissors provide clean cuts without fraying, while a rotary cutter offers even more precision, especially for straight lines and intricate designs. A cutting mat protects your work surface and provides a non-slip surface for accurate cutting. Finally, a ruler or measuring tape helps you measure and mark your cutting lines with precision. With these tools at your disposal, you’ll be well-equipped to embark on your t-shirt cutting projects with confidence and achieve professional-looking results.
Now that we have covered the necessary tools, let’s move on to the next section: “Preparing the T-Shirt for Cutting.”
Preparing the T-Shirt for Cutting
Washing and Drying the T-Shirt
Before you start cutting your t-shirt, it’s important to ensure that it is clean and free from any dirt or stains. Washing and drying the t-shirt will not only make it easier to work with but also ensure that the fabric doesn’t shrink or warp after cutting.
To wash your t-shirt, simply follow the instructions on the care label. Use a mild detergent and set the washing machine to a gentle cycle. Avoid using bleach or harsh chemicals as they can damage the fabric. Once the washing cycle is complete, remove the t-shirt from the machine and gently squeeze out any excess water.

Next, it’s time to dry the t-shirt. You can either air dry it by hanging it on a clothesline or lay it flat on a clean, dry surface. Avoid using a dryer as the heat can cause the fabric to shrink. Allow the t-shirt to dry completely before moving on to the next step.
Ironing the T-Shirt
Ironing the t-shirt is an important step in preparing it for cutting. This will help remove any wrinkles or creases, ensuring a smooth surface for accurate cutting. It’s best to use a medium heat setting on your iron and make sure to check the care label to see if there are any specific ironing instructions for the fabric.
Start by setting up your ironing board and plugging in the iron to heat up. Lay the t-shirt flat on the ironing board, making sure there are no wrinkles or folds. Begin ironing from the collar down, using smooth and even strokes. Pay special attention to any stubborn wrinkles or creases, applying a bit more pressure if needed.
Remember to iron both the front and back of the t-shirt to ensure all areas are smooth. Once you’re done ironing, let the t-shirt cool down before handling it further. This will prevent any accidental burns while marking or cutting the fabric.
Marking the Cutting Lines
Before you start cutting your t-shirt, it’s crucial to mark the cutting lines accurately. This will help you achieve the desired shape and ensure that your cuts are precise. There are several methods you can use to mark the cutting lines, depending on your preference and the tools you have available.

One common method is to use tailor’s chalk or fabric markers. These can easily be found at your local craft store and come in various colors. Simply draw the desired cutting lines directly onto the fabric. Make sure to use a contrasting color that is visible on the t-shirt. If you’re using a fabric marker, test it on a small, inconspicuous area first to ensure it doesn’t bleed or stain the fabric.
Alternatively, you can use masking tape or painter’s tape to create straight lines. Simply place the tape along the areas you want to cut, ensuring it adheres firmly to the fabric. This method is particularly useful for creating geometric or symmetrical designs.
If you prefer a more precise approach, you can also use rulers or measuring tapes to measure and mark the cutting lines. This is especially helpful when you want to achieve specific dimensions or angles in your cuts.
Once you’ve marked the cutting lines, take a step back and assess the design. Make any necessary adjustments or corrections before proceeding to the cutting phase. It’s always a good idea to double-check your markings to ensure they are accurate and aligned.
Remember, taking the time to properly prepare your t-shirt for cutting will greatly contribute to the overall success of your project. By washing and drying the fabric, ironing out any wrinkles, and marking the cutting lines accurately, you’ll be well on your way to creating a unique and stylish cut t-shirt.
Basic Cutting Techniques
Straight Cut
The straight cut is one of the most basic and versatile cutting techniques for transforming a t-shirt. It involves cutting along a straight line to create a clean and simple look. To achieve a straight cut, you will need a pair of fabric scissors or a rotary cutter and a ruler or measuring tape for precise measurements.
To begin, lay your t-shirt flat on a cutting mat to ensure stability and prevent any accidental slips. Use the ruler or measuring tape to mark the desired length of your cut. Make sure to measure from the bottom hem of the shirt for consistency. Once you have marked the cutting line, carefully cut along it using fabric scissors or a rotary cutter.
Slit Cut
The slit cut is a stylish and fashionable way to add some flair to your t-shirt. It involves creating small slits along the sides or back of the shirt to create a unique and eye-catching design. To achieve a slit cut, you will need fabric scissors and a ruler or measuring tape.
Start by determining the desired length of the slits. Measure from the bottom hem of the shirt and mark the cutting lines using a ruler or measuring tape. Make sure the slits are evenly spaced and symmetrical for a balanced look. Once you have marked the lines, carefully cut along them to create the slits. You can leave the edges raw for a more edgy look or fold them over and sew them for a neater finish.
Fringe Cut
The fringe cut is a fun and playful cutting technique that adds texture and movement to your t-shirt. It involves cutting small strips along the bottom hem of the shirt to create a fringe-like effect. To achieve a fringe cut, you will need fabric scissors and a ruler or measuring tape.

Start by determining the desired length of the fringe. Measure from the bottom hem of the shirt and mark the cutting lines with a ruler or measuring tape. Make sure the strips are evenly spaced and symmetrical for a balanced look. Once you have marked the lines, carefully cut along them to create the fringe. You can leave the edges raw for a more casual look or fold them over and sew them for a neater finish.
Crop Cut
The crop cut is a trendy and popular cutting technique that transforms a regular t-shirt into a stylish crop top. It involves cutting the shirt to a shorter length, typically just above the waist or at the desired crop point. To achieve a crop cut, you will need fabric scissors and a ruler or measuring tape.
Start by deciding on the desired length of the crop. Measure from the bottom hem of the shirt and mark the cutting line using a ruler or measuring tape. Make sure to cut in a straight line for a clean and even crop. Once you have marked the line, carefully cut along it to create the crop. You can leave the edges raw for a more casual look or fold them over and sew them for a neater finish.
Incorporating these basic cutting techniques into your t-shirt transformations is a great way to add your personal touch and create unique and stylish pieces. Experiment with different cuts and styles to find what suits your taste and preferences. Remember to always use the appropriate tools and take your time to ensure accurate and precise cuts. Happy cutting!
| Basic Cutting Techniques |
|---|
| Straight Cut |
| Slit Cut |
| Fringe Cut |
| Crop Cut |
Advanced Cutting Techniques
Braided Cut
One of the most popular advanced cutting techniques for transforming a regular t-shirt into a trendy and unique piece is the braided cut. This technique involves creating intricate braided patterns on the fabric, adding texture and visual interest. To achieve this look, you will need a few tools, including fabric scissors, a ruler or measuring tape, and a cutting mat.
To start, lay your t-shirt flat on the cutting mat and use the ruler or measuring tape to mark the desired length of the braided section. Make sure to measure accurately to achieve even braids. Once you have marked the cutting lines, use the fabric scissors to carefully make small slits along these lines. Make sure not to cut all the way through the fabric, as you want to leave a small strip of fabric intact to create the braids.
Once you have made the slits, you can begin braiding the fabric strips. Take three adjacent strips and start braiding them together, just like you would with hair. Continue braiding until you reach the end of the strips. Repeat this process for all the marked sections, creating a series of braids across the t-shirt.
The braided cut adds a touch of bohemian flair to any t-shirt, making it perfect for music festivals or casual outings. Pair it with jeans or a maxi skirt for a laid-back and stylish look.
Racerback Cut
If you want to give your t-shirt a sporty and edgy vibe, the racerback cut is a great option. This cutting technique involves removing the back fabric of the t-shirt, creating a racerback-style design. To achieve this look, you will need fabric scissors, a ruler or measuring tape, and a cutting mat.
Start by laying your t-shirt flat on the cutting mat and use the ruler or measuring tape to mark the desired length and shape of the racerback. For a classic racerback look, you can create a curved line from the shoulder to the center of the back. Once you have marked the cutting lines, use the fabric scissors to carefully cut along these lines, removing the back fabric.
When cutting the racerback, it’s important to be precise and avoid cutting too much fabric. Start with small cuts and gradually trim more if needed. You can always adjust the shape later.
The racerback cut is perfect for showing off your shoulders and adding a sporty touch to your outfit. Pair your newly cut t-shirt with leggings or shorts for a stylish gym look or dress it up with a skirt and statement accessories for a night out.
Sleeveless Cut
For those hot summer days or when you simply want to show off your toned arms, the sleeveless cut is a go-to option. This cutting technique involves removing the sleeves of the t-shirt, creating a sleeveless design. To achieve this look, you will need fabric scissors, a ruler or measuring tape, and a cutting mat.
Start by laying your t-shirt flat on the cutting mat and use the ruler or measuring tape to mark the desired length of the sleeveless section. Once you have marked the cutting lines, use the fabric scissors to carefully cut along these lines, removing the sleeves. Be mindful of the armhole size you want and adjust the length accordingly.
When cutting the sleeves, it’s important to make clean and even cuts. Take your time and ensure that both sleeves are cut symmetrically. You can always trim more if needed.
The sleeveless cut is versatile and can be dressed up or down depending on the occasion. Pair it with shorts or a skirt for a casual summer look or layer it under a blazer for a more polished outfit.
Off-Shoulder Cut
If you want to embrace your feminine side and show off your shoulders, the off-shoulder cut is a stylish choice. This cutting technique involves removing a portion of the neckline to create an off-shoulder look. To achieve this look, you will need fabric scissors, a ruler or measuring tape, and a cutting mat.
Start by laying your t-shirt flat on the cutting mat and use the ruler or measuring tape to mark the desired length of the off-shoulder section. Once you have marked the cutting lines, use the fabric scissors to carefully cut along these lines, removing the designated portion of the neckline. Be mindful of the width you desire for the off-shoulder look and adjust the length accordingly.
When cutting the neckline, it’s important to make clean and even cuts. Take your time and ensure that both sides are cut symmetrically. You can always trim more if needed.
The off-shoulder cut adds a touch of femininity and elegance to any t-shirt. Pair it with high-waisted jeans or a flowing skirt for a chic and romantic look. You can also accessorize with statement earrings or a delicate necklace to enhance the off-shoulder effect.
Adding Decorative Elements
Are you ready to take your t-shirt cutting skills to the next level? In this section, we will explore various decorative elements that you can add to your cut t-shirts to make them even more unique and stylish. From lace inserts to fabric paint, the possibilities are endless. Let’s dive in!
Lace Inserts
Lace inserts are a fantastic way to add a touch of femininity and elegance to your cut t-shirts. By strategically placing lace panels or trim, you can instantly transform a plain t-shirt into a delicate and eye-catching piece. Whether you choose to add lace to the sleeves, neckline, or back of your t-shirt, the result will be a beautifully textured and visually appealing garment.
To incorporate lace inserts into your cut t-shirt, follow these simple steps:
- Choose your lace: Select a lace trim or fabric that complements the color and style of your t-shirt. Opt for a contrasting color to make the lace stand out or choose a matching shade for a more subtle look.
- Measure and cut: Carefully measure the area where you want to place the lace insert. Use a ruler or measuring tape to ensure precision. Once measured, cut the lace to the desired length or shape, ensuring it fits perfectly within the designated area.
- Secure the lace: Pin the lace in place on the t-shirt, making sure it is aligned correctly. Then, using a sewing machine or needle and thread, stitch the lace securely onto the t-shirt. Be sure to hide the stitches within the lace pattern for a seamless finish.
- Finishing touches: Once the lace is attached, trim any excess fabric or thread. Give your t-shirt a final press with an iron to ensure the lace lies flat and smooth.
Now, you have a stunning t-shirt with a delicate lace insert that is bound to turn heads wherever you go.
Pom-Pom Trim
If you’re looking to add a playful and whimsical touch to your cut t-shirts, pom-pom trim is the way to go. The soft and fluffy texture of pom-poms instantly adds a fun and festive vibe to any garment. Whether you choose to adorn the hemline, sleeves, or neckline, pom-pom trim is sure to make a statement.
To incorporate pom-pom trim into your cut t-shirt, follow these simple steps:
- Choose your pom-pom trim: Select a pom-pom trim in a color that complements your t-shirt. You can find pom-pom trim in various sizes and materials, so choose the one that best suits your style.
- Measure and cut: Measure the area where you want to attach the pom-pom trim. Cut the trim to the desired length, ensuring it fits perfectly within the designated area.
- Attach the trim: Pin the pom-pom trim in place on the t-shirt, making sure it is aligned correctly. Using a sewing machine or needle and thread, stitch the trim securely onto the t-shirt. Take care to sew close to the edge of the trim to ensure it stays in place.
- Finishing touches: Once the trim is attached, trim any excess fabric or thread. Give your t-shirt a final press with an iron to ensure the pom-poms are fluffy and well-distributed.
With the addition of pom-pom trim, your cut t-shirt will exude a sense of fun and playfulness that is sure to make you stand out from the crowd.
Fabric Paint or Markers
If you’re feeling artistic and want to personalize your cut t-shirt, fabric paint or markers are fantastic tools to unleash your creativity. With these tools, you can create unique designs, patterns, or even write messages on your t-shirt. The possibilities are endless, and the result will be a one-of-a-kind wearable art piece.
To use fabric paint or markers on your cut t-shirt, follow these simple steps:
- Choose your design: Decide on the design or pattern you want to create on your t-shirt. You can sketch it out on paper first or let your imagination run wild.
- Prepare your t-shirt: Lay your t-shirt on a flat surface and ensure it is clean and dry. Place a piece of cardboard or plastic inside the t-shirt to prevent the paint or markers from bleeding through.
- Start painting or coloring: Using fabric paint or markers, carefully apply your design to the t-shirt. Take your time and be precise, as any mistakes may be difficult to correct.
- Let it dry: Allow the paint or markers to dry completely according to the manufacturer’s instructions. This step is crucial to ensure the design sets properly and remains vibrant.
- Set the design: To ensure the longevity of your design, follow the instructions provided with the fabric paint or markers to set the design. This usually involves heat-setting the paint or markers with an iron or placing the t-shirt in a dryer.
Once the design is set, you can proudly wear your personalized cut t-shirt, showcasing your artistic flair for all to see.
Patchwork Appliqué
Patchwork appliqué is a creative technique that involves attaching fabric patches or shapes onto a t-shirt to create a visually striking design. By combining different fabrics, colors, and textures, you can add depth and dimension to your cut t-shirts, turning them into wearable works of art.
To create patchwork appliqué on your cut t-shirt, follow these simple steps:
- Choose your fabric: Select a variety of fabrics that complement each other and your t-shirt. Consider different patterns, textures, and colors to create an interesting contrast.
- Cut out the shapes: Using fabric scissors, cut out the desired shapes or patches from the chosen fabrics. These can be simple geometric shapes or more intricate designs, depending on your preference.
- Arrange and pin: Lay out the fabric shapes on your t-shirt, experimenting with different layouts until you find one that you love. Once satisfied, pin the fabric shapes in place.
- Attach the patches: Using a sewing machine or needle and thread, stitch the fabric patches securely onto the t-shirt. You can sew along the edges of the patches or create additional decorative stitching for added visual interest.
- Finishing touches: Trim any excess fabric or thread and give your t-shirt a final press with an iron to ensure everything lies flat and smooth.
With patchwork appliqué, your cut t-shirt will become a stunning collage of fabrics, showcasing your creativity and love for unique fashion.
Incorporating decorative elements into your cut t-shirts allows you to showcase your personal style and creativity. Whether you choose lace inserts, pom-pom trim, fabric paint, or patchwork appliqué, each technique adds a unique touch that sets your t-shirts apart from the rest. So, get ready to unleash your inner designer and elevate your t-shirt cutting game to new heights!
Styling and Wearing Cut T-Shirts
Layering with Tank Tops
When it comes to styling and wearing cut t-shirts, one popular option is layering them with tank tops. Layering adds depth and dimension to your outfit, creating a stylish and trendy look. Plus, it allows you to play with different colors and patterns, giving you endless possibilities for creating unique combinations.
To achieve the layered look, start by selecting a tank top that complements the color or design of your cut t-shirt. Opt for a tank top in a contrasting color to make a bold statement or choose one in a similar shade for a more cohesive look.
Once you have your tank top, simply put it on underneath your cut t-shirt. You can let the tank top peek out from the bottom hem, creating a layered effect. Alternatively, you can also wear the tank top underneath the cut t-shirt and let the straps show for a more subtle layered look.
Knotting the Hem
Another fun and stylish way to wear a cut t-shirt is by knotting the hem. Knotting adds a touch of flair and can instantly transform a regular t-shirt into a trendy fashion piece. Plus, it allows you to customize the length and fit of your t-shirt.
To knot the hem, start by putting on your cut t-shirt. Then, gather the fabric at the front or side of the t-shirt, depending on your preference. Hold the gathered fabric firmly and tie a knot, adjusting the tightness to achieve your desired look. You can leave the ends of the knot hanging loose or tuck them in for a neater finish.
Pairing with High-Waisted Bottoms
When it comes to styling cut t-shirts, pairing them with high-waisted bottoms is a match made in fashion heaven. High-waisted bottoms, such as jeans, skirts, or shorts, create a flattering silhouette and accentuate your curves. They also help to elongate your legs, giving you a taller and leaner appearance.
To create a stylish ensemble, choose a pair of high-waisted bottoms that complement the color or design of your cut t-shirt. For a casual look, opt for a pair of high-waisted denim shorts and a graphic cut t-shirt. If you’re going for a more polished outfit, pair a high-waisted skirt with a solid-colored cut t-shirt.
Tying at the Side or Back
If you’re looking to add a unique twist to your cut t-shirt, consider tying it at the side or back. This simple yet stylish technique can instantly elevate your outfit and make a fashion statement. Plus, it allows you to adjust the fit and shape of your t-shirt to suit your personal style.
To tie your cut t-shirt at the side, start by putting it on and gathering the fabric at one side of your waist. Hold the fabric firmly and tie a knot, adjusting the tightness to your liking. You can leave the ends of the knot hanging loose or tuck them in for a cleaner look.
Alternatively, you can also tie your cut t-shirt at the back. Put on your t-shirt and gather the fabric at the center of your back. Tie a knot, making sure it sits comfortably and doesn’t pull too tightly. This creates a unique and eye-catching detail, perfect for adding a touch of flair to your outfit.
In conclusion, there are various ways to style and wear cut t-shirts to create fashionable and trendy looks. Whether you choose to layer them with tank tops, knot the hem, pair them with high-waisted bottoms, or tie them at the side or back, the possibilities are endless. Experiment with different techniques and have fun expressing your personal style through your cut t-shirts.