Capturing screenshots on a Lenovo Yoga device is a simple process that can be accomplished through various methods, depending on your specific model and operating system. Whether you’re using a Yoga tablet or laptop, there are multiple ways to take and save screenshots for your convenience.
Using Physical Buttons
To capture a screenshot on a Lenovo Yoga device using physical buttons:
- For Yoga tablets: Press and hold the Power button and Volume Down button simultaneously. The screen will flash, indicating a successful capture.
- For Yoga laptops: Press the Windows key + PrtSc (Print Screen) key together. The screen will briefly dim, signaling that the screenshot has been taken.
Screenshots taken using these methods are automatically saved to the Pictures > Screenshots folder on your device. On tablets, you can also access your screenshots through the Photos app in the Screenshots catalog.
Snipping Tool Techniques
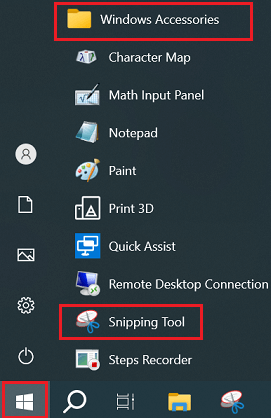

The Snipping Tool offers versatile screenshot options for Lenovo Yoga devices running Windows. To access it, press Windows key + Shift + S to open the snipping interface. This shortcut allows you to select from different capture modes:
- Rectangular snip: Drag to select a custom rectangular area
- Freeform snip: Draw any shape to capture
- Window snip: Select a specific window or dialog box
- Fullscreen snip: Capture the entire screen
After taking a snip, it’s copied to the clipboard and a notification appears. Click the notification to open the Snipping Tool editor, where you can annotate, crop, or save the image. For quick captures without editing, enable the “Save snips” option in Snipping Tool settings to automatically save screenshots.
Tablet Mode Screenshots
When using a Lenovo Yoga device in tablet mode, taking screenshots requires a slightly different approach:
- On Yoga tablets, press the Power button and Volume Down button simultaneously to capture a full-screen image.
- For Yoga laptops in tablet mode, use the Windows button + Volume Down key combination.
- If your device has a Windows button, you can also try Windows button + Power button.
Some Yoga models offer additional screenshot options in tablet mode. For instance, you can swipe up from the bottom of the screen and select the “Screenshot” option, which may allow you to capture either the full screen or a selected portion. These screenshots are typically saved in the device’s gallery or a dedicated Screenshots folder for easy access.
Third-Party Screenshot Tools
For users seeking more advanced screenshot capabilities on their Lenovo Yoga devices, third-party software offers enhanced features and flexibility. Popular options include:

- ScreenRec: A lightweight tool that allows instant capturing and sharing of screenshots with a private link. It offers annotation tools and 2GB of free cloud storage.
- Awesome Screenshot & Recorder: This browser extension provides comprehensive screenshot and recording functionality, including full-page captures and video recording.
- Lightshot: A user-friendly alternative that enables quick selection and editing of screenshot areas.
These applications often provide additional features like instant cloud uploads, advanced editing tools, and easy sharing options, making them valuable for users who frequently capture and share screenshots in professional or educational settings.