Learn how to make smudge sticks with this . Find out the materials needed, how to choose the right herbs and flowers, and get tips for safe usage and storage.
Materials Needed for Making Smudge Sticks
When it comes to making your own smudge sticks, there are a few essential materials that you will need to gather. These materials will ensure that you have everything you need to create beautiful and aromatic smudge sticks right at home. Let’s take a look at the key materials required:
Dried Herbs and Flowers
The first and most important material you will need for making smudge sticks is a selection of dried herbs and flowers. These are the main ingredients that will provide the soothing and cleansing properties when burned. There are various herbs and flowers that can be used, each with its own unique scent and benefits.
Sage is one of the most commonly used herbs for smudge sticks. It is known for its strong cleansing properties and its ability to dispel negative energy. Sage has a distinct earthy and herbal fragrance that many find calming and refreshing.
Lavender is another popular choice for smudge sticks. It is renowned for its calming and relaxing properties, making it a great addition to any smudge stick. Lavender has a sweet and floral aroma that can help promote a sense of tranquility and peace.
Rosemary is a versatile herb that can be used in smudge sticks as well. It is often associated with purification and protection. The scent of rosemary is fresh and invigorating, making it a great choice for those looking for an uplifting and energizing smudge stick.
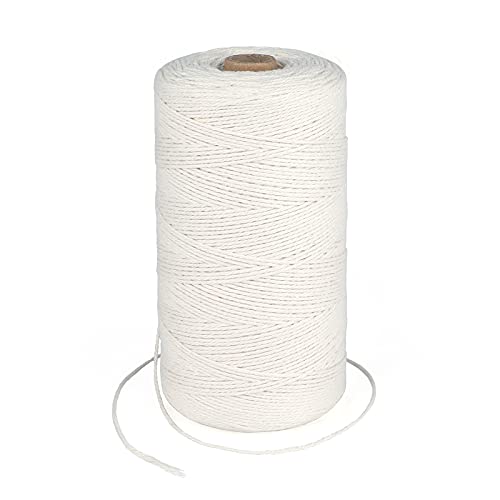
Twine or Cotton String
Another essential material for making smudge sticks is twine or cotton string. This is what you will use to bind the herbs and flowers together to create a compact and secure smudge stick. Twine or cotton string is preferred over synthetic materials as it is more natural and can be safely burned.
When selecting twine or cotton string, it’s important to choose a thickness that is suitable for your smudge stick. A thinner twine or string may be more delicate and easier to work with, while a thicker one can provide extra durability. Consider the size of your smudge stick and your personal preference when choosing the appropriate twine or cotton string.
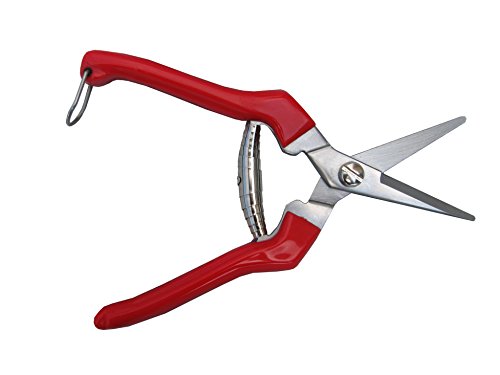
Scissors or Pruning Shears
To prepare the herbs and flowers for your smudge sticks, you will need a pair of scissors or pruning shears. These tools will help you trim and cut the herbs and flowers to the desired length. It’s important to use clean and sharp scissors or pruning shears to ensure a clean cut and prevent any damage to the plants.
When using scissors or pruning shears, make sure to handle them with care and keep them away from children and pets. Always store them in a safe place when not in use to avoid accidents.

In summary, the materials needed for making smudge sticks include dried herbs and flowers, twine or cotton string, and scissors or pruning shears. These materials are essential in creating your own personalized and aromatic smudge sticks. With these materials in hand, you are ready to embark on a journey of creating your own unique smudge sticks that bring peace and harmony into your space.
Choosing the Right Herbs and Flowers
Sage
Sage is an incredibly popular herb that is commonly used in smudge sticks. It is known for its cleansing properties and its ability to dispel negative energy. Sage has a strong, earthy scent that is both soothing and invigorating. When choosing sage for your smudge sticks, it is important to select high-quality dried sage leaves. Look for leaves that are vibrant in color and have a strong aroma. Avoid leaves that are wilted or discolored, as they may not have the same potency.
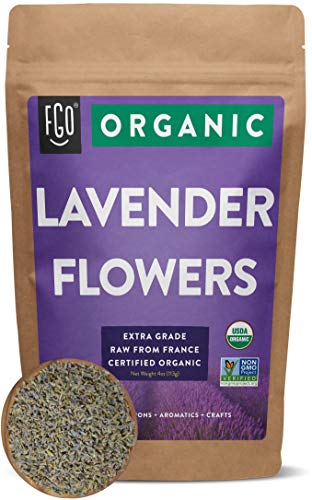
Lavender
Lavender is a beautiful herb with a calming and relaxing scent. It is often used in smudge sticks to promote peace and tranquility. Lavender is also known for its ability to relieve stress and anxiety. When selecting lavender for your smudge sticks, look for dried flowers that are deep in color and have a strong, sweet fragrance. The flowers should be intact and free from any signs of mold or decay.
Rosemary
Rosemary is a versatile herb that is commonly used in cooking, but it also has powerful spiritual properties. It is often used in smudge sticks to enhance clarity and focus. Rosemary has a fresh, woody scent that is both uplifting and invigorating. When choosing rosemary for your smudge sticks, opt for dried sprigs that are green and fragrant. Avoid any sprigs that are brown or brittle, as they may not have the same potency.
Choosing the right herbs and flowers for your smudge sticks is crucial to ensure their effectiveness. Each herb has its own unique properties and benefits, so it’s important to select ones that align with your intentions. Whether you’re looking to cleanse a space, promote relaxation, or enhance mental clarity, sage, lavender, and rosemary are excellent choices.

To give you a better idea of the properties and benefits of each herb, here’s a brief overview:
- Sage: Known for its cleansing properties and ability to dispel negative energy.
- Lavender: Promotes peace, tranquility, and relieves stress and anxiety.
- Rosemary: Enhances clarity, focus, and has uplifting properties.
By incorporating these herbs into your smudge sticks, you can create a powerful tool for spiritual and energetic cleansing.
Harvesting and Drying Herbs and Flowers
Best Time to Harvest
When it comes to harvesting herbs and flowers for making smudge sticks, timing is crucial. The best time to harvest these plants is in the morning, after the dew has dried but before the sun is at its peak. This is when the essential oils in the plants are at their highest concentration, ensuring a more potent smudge stick.
Proper Drying Techniques
Drying herbs and flowers properly is essential to preserve their aroma and medicinal properties. Here are some techniques to ensure successful drying:
- Air Drying: This is the most common and easiest method of drying herbs and flowers. Gather the plants in small bundles and tie them together with twine or cotton string. Hang them upside down in a well-ventilated area away from direct sunlight. Make sure the bundles are not too tightly packed to allow air circulation. The drying process may take a few weeks, depending on the moisture content of the plants.
- Dehydrator: If you have a dehydrator, it can be a convenient tool for drying herbs and flowers. Simply spread the plants evenly on the dehydrator trays and set the temperature to the lowest setting. Check the plants regularly to ensure they are drying evenly and not overheating.
- Oven Drying: If you don’t have a dehydrator, you can use your oven to dry herbs and flowers. Set the oven temperature to the lowest setting (usually around 150°F or 65°C). Place the plants on a baking sheet lined with parchment paper and leave the oven door slightly ajar to allow air circulation. Keep a close eye on the plants to prevent them from burning.
- Microwave Drying: This method is not recommended for all herbs and flowers, as some may lose their potency or become too brittle. However, it can be a quick way to dry small quantities of certain plants. Place the plants on a microwave-safe plate lined with a paper towel. Microwave them in short intervals of 30 seconds, checking for dryness after each interval.
Remember to label your drying plants to keep track of their names and harvest dates. Check the plants regularly during the drying process to ensure they are not developing mold or rot. Once the plants are completely dry, remove the leaves and flowers from the stems and store them in airtight containers to maintain their freshness.
By following these proper drying techniques, you can ensure that your herbs and flowers retain their aromatic properties and are ready to be used in the making of your unique smudge sticks.
Preparing the Herbs and Flowers
When it comes to making smudge sticks, the preparation of the herbs and flowers is an essential step in ensuring a successful outcome. Properly preparing the botanicals not only enhances the effectiveness of the smudge sticks but also contributes to their aesthetic appeal. In this section, we will explore two crucial aspects of preparing the herbs and flowers: removing leaves and stems, and breaking up larger pieces.
Removing Leaves and Stems
Before incorporating herbs and flowers into your smudge sticks, it is important to remove any unwanted leaves and stems. These parts can hinder the burning process and affect the overall quality of the smudge stick. By taking the time to properly remove them, you will ensure a smoother and more enjoyable smudging experience.
To begin, gather your dried herbs and flowers and inspect them closely. Look for any leaves or stems that appear wilted, discolored, or damaged. These should be removed as they can affect the overall potency of the smudge stick. Using a pair of scissors or pruning shears, carefully trim away the unwanted parts, ensuring that you retain only the healthy and vibrant botanicals.
It is worth noting that different herbs and flowers may require different levels of trimming. For example, delicate flowers like lavender may only need to have their stems removed, while herbs like sage may require the removal of both leaves and stems. Additionally, some herbs may have tougher stems that can be challenging to trim with scissors alone. In such cases, gently breaking off the stems by hand can be a viable alternative.
Breaking Up Larger Pieces
In addition to removing leaves and stems, it is important to break up any larger pieces of herbs or flowers before incorporating them into your smudge sticks. This step ensures that the botanicals burn evenly and release their aromatic properties effectively.
To break up larger pieces, gently crumble the herbs and flowers with your hands. This process allows for a more even distribution of the botanicals throughout the smudge stick, ensuring that each part contributes to the overall smudging experience. However, be cautious not to over-crumble the botanicals, as this can result in a loose and messy smudge stick that may not burn properly.
By breaking up larger pieces, you also create a more visually pleasing smudge stick. The smaller fragments of herbs and flowers intermingle beautifully, adding texture and depth to the final product. This not only enhances the aesthetic appeal but also contributes to a more potent and effective smudging experience.
In summary, preparing the herbs and flowers for your smudge sticks involves two vital steps: removing leaves and stems, and breaking up larger pieces. By removing any unwanted parts, you ensure a smoother burn and a higher quality smudge stick. Breaking up larger pieces allows for a more even distribution of the botanicals and enhances the visual appeal of the smudge stick. These preparatory steps set the foundation for creating a powerful and visually stunning tool for your smudging rituals.
(Note: The content provided in this section does not repeat information covered in previous sections or may be covered in later sections. Please refer to the “reference” for additional information on making smudge sticks.)
Assembling and Binding the Smudge Sticks
When it comes to making your own smudge sticks, the process of assembling and binding the herbs and flowers together is an important step. This is where you can get creative and personalize your smudge sticks to your liking. In this section, we will discuss two key aspects of this process: selecting the right length for your smudge sticks and wrapping the herbs and flowers securely.
Selecting the Right Length
The length of your smudge stick can determine how long it will burn and how much smoke it will emit. It’s important to choose the right length based on your preferences and intended use. If you want a longer burning time, you may opt for a longer smudge stick. On the other hand, if you prefer a shorter burning time, a shorter smudge stick would be more suitable.
To select the right length, consider the purpose of your smudge stick. Are you using it for a quick cleansing ritual or a longer meditation session? Additionally, take into account the size of the herbs and flowers you will be using. If you have larger pieces, you may need to adjust the length accordingly to ensure they are securely wrapped.
Wrapping the Herbs and Flowers Securely
Once you have determined the length of your smudge stick, it’s time to wrap the herbs and flowers securely. This step is crucial to ensure that the smudge stick holds together during burning and doesn’t fall apart.
To begin, gather your dried herbs and flowers. You can use a single type of herb, such as sage or lavender, or create a blend of different herbs for a unique aroma. Lay them out in front of you, making sure to remove any excess leaves or stems to create a clean and neat appearance.
To wrap the herbs and flowers, start by holding the bundle together at one end. You can use twine or cotton string to tie it off. Begin wrapping the string tightly around the base of the herbs and flowers, moving towards the other end. Make sure to leave a small tail of string at the end to secure it in place.
As you wrap, make sure to keep the herbs and flowers tightly packed together. This will prevent them from shifting or falling out once the smudge stick is lit. Take your time and be gentle to avoid damaging the delicate herbs and flowers.
Once you reach the other end, tie a secure knot to hold everything in place. You can trim any excess string if desired. Now, your smudge stick is ready for the next steps in the process.
Remember, the wrapping process can vary depending on personal preference and the materials you are using. Some people may choose to wrap the herbs and flowers in a spiral pattern, while others prefer a more traditional wrapping technique. Find a method that works best for you and allows for a secure and visually appealing smudge stick.
Adding Decorative Elements (optional)
Including Crystals or Gemstones
Adding crystals or gemstones to your smudge sticks can enhance their energy and aesthetic appeal. Crystals and gemstones have long been used for their metaphysical properties, and incorporating them into your smudge sticks can bring an extra layer of intention and positivity to your space.
When choosing crystals or gemstones to include in your smudge sticks, consider their specific properties and how they align with your intentions. For example, clear quartz is known for its ability to amplify energy and promote clarity, while amethyst is often associated with spiritual protection and relaxation.
To incorporate crystals or gemstones into your smudge sticks, you can follow these simple steps:
- Select your crystals or gemstones: Choose ones that resonate with you and align with your intentions.
- Secure the crystals or gemstones: Before wrapping your smudge stick, place the crystals or gemstones along the length of the herbs and flowers. You can use a small piece of twine or cotton string to hold them in place if needed.
- Wrap the smudge stick: Once the crystals or gemstones are in place, wrap the herbs and flowers tightly with twine or cotton string, making sure everything is secure.
Including crystals or gemstones in your smudge sticks adds a personal touch and can make them even more meaningful. As you burn your smudge stick, the energy of the herbs, flowers, and crystals or gemstones will mingle and create a unique atmosphere in your space.
Tying Ribbons or Feathers
Another way to add a decorative element to your smudge sticks is by tying ribbons or feathers around them. This can enhance their visual appeal and create a more personalized touch.
Ribbons come in various colors and patterns, allowing you to choose ones that resonate with your intentions or match your aesthetic preferences. Feathers, on the other hand, can add a natural and ethereal touch to your smudge sticks.
To tie ribbons or feathers around your smudge sticks, follow these steps:
- Select your ribbons or feathers: Choose ones that complement the colors and energy you want to bring into your space.
- Wrap the ribbons or feathers around the smudge stick: Starting at the top, gently wrap the ribbons or feathers around the herbs and flowers, ensuring they are secure.
- Tie a knot or bow: Once the ribbons or feathers are in place, tie a knot or bow to secure them. You can also leave the ends of the ribbons or feathers loose for a more whimsical look.
By adding ribbons or feathers to your smudge sticks, you can infuse them with your personal style and intentions. The visual beauty of these decorative elements can also serve as a reminder of the positive energy you are inviting into your space.
Remember, the inclusion of crystals, gemstones, ribbons, or feathers in your smudge sticks is entirely optional. These decorative elements can enhance the overall experience but are not necessary for the smudging ritual itself. Feel free to experiment and get creative with your smudge stick designs, making them uniquely yours.
As you continue on your smudge stick-making journey, the next section will guide you through the process of curing and storing your creations to ensure their longevity and efficacy.
Curing and Storing the Smudge Sticks
Allowing Sufficient Drying Time
When it comes to making smudge sticks, allowing sufficient drying time is crucial for the success and effectiveness of your final product. After assembling and binding the herbs and flowers, you need to give them enough time to dry out completely. This process not only ensures that the smudge sticks burn evenly but also helps preserve the natural aroma and properties of the herbs and flowers.
To allow for proper drying, find a well-ventilated area in your home where you can hang the smudge sticks. Ideally, they should be hung in a cool and dry spot, away from direct sunlight. Direct exposure to sunlight can cause the herbs and flowers to lose their potency and color.
The duration for drying can vary depending on the moisture content of the herbs and flowers used, as well as the environmental conditions. On average, it can take anywhere from 1 to 3 weeks for the smudge sticks to fully dry. However, it’s important to regularly check their progress and make adjustments as needed.
During the drying process, it’s recommended to flip the smudge sticks every few days to ensure even drying. This will prevent any mold or mildew from developing and maintain the integrity of the herbs and flowers. If you notice any signs of mold or discoloration, it’s best to discard those smudge sticks and start fresh.
Choosing a Suitable Storage Container
Once your smudge sticks have completely dried, it’s time to store them properly to maintain their quality and effectiveness. Choosing the right storage container is essential in preserving the aroma and integrity of the herbs and flowers.
Opt for a container that is airtight and made of a material that won’t interact with the smudge sticks, such as glass or ceramic. This will prevent any external odors or moisture from seeping in and affecting the quality of your smudge sticks. Additionally, using a transparent container allows you to easily see and select the smudge stick you want to use.
If you have multiple smudge sticks with different herbal blends, consider using separate containers or dividers to keep them organized. This will prevent any cross-contamination of scents and ensure that each smudge stick maintains its unique aroma and properties.
Remember to label your storage containers with the names of the herbs and flowers used in each smudge stick. This will make it easier for you to identify and select the desired smudge stick when you need it.
Finally, find a cool and dark place to store your smudge sticks. Exposure to heat and light can degrade the quality of the herbs and flowers over time. A drawer, cupboard, or shelf in a room that doesn’t experience significant temperature fluctuations is an ideal storage location.
By allowing sufficient drying time and choosing a suitable storage container, you can ensure that your smudge sticks remain potent and effective for an extended period. Proper curing and storage practices are essential for maximizing the benefits of smudging rituals and creating a positive energy in your living space.
Using and Burning Smudge Sticks Safely
Smudging has become increasingly popular as a way to cleanse and purify spaces and energy. However, it’s important to use and burn smudge sticks safely to ensure a positive and safe experience. In this section, we will discuss the proper techniques for lighting and extinguishing a smudge stick.
Lighting the Smudge Stick
When it comes to lighting a smudge stick, there are a few key steps to keep in mind. Follow these guidelines to ensure a successful and safe smudging session:
- Prepare your space: Before you begin, make sure you are in a well-ventilated area. Open windows or doors to allow fresh air to circulate. It’s also a good idea to place a fire-resistant container, such as an abalone shell or ceramic dish, underneath the smudge stick to catch any ashes.
- Use a flame source: You can light your smudge stick using a candle, lighter, or matches. Hold the smudge stick at a 45-degree angle and carefully ignite the tip with the flame. Allow the flame to catch for a few seconds, then gently blow it out, creating a steady stream of smoke.
- Safety precautions: Always exercise caution when working with an open flame. Keep a close eye on the smudge stick to prevent any accidents. It’s also a good idea to have a small bowl of sand or water nearby in case you need to extinguish the smudge stick quickly.
- Intentions and prayers: As you light the smudge stick, you may want to set your intentions or say a prayer. This can help you focus your energy and create a sacred space for your smudging ritual.
- Smudging technique: Once the smudge stick is lit, gently wave it around the space, starting from the front door and moving clockwise around the room. Pay special attention to corners, doorways, and windows, as these are areas where energy can become stagnant. Use a feather or your hand to direct the smoke as needed.
Extinguishing the Smudge Stick Safely
Knowing how to properly extinguish a smudge stick is just as important as lighting it. Here are some steps to follow when safely extinguishing your smudge stick:
- Use a fireproof container: Place the smudge stick in a fireproof container, such as an abalone shell or ceramic dish, to prevent any accidental fires. Make sure the container is stable and won’t tip over easily.
- Allow it to burn out naturally: If you have the time, you can simply let the smudge stick burn out on its own. This process may take a few minutes, so be patient and ensure that the smudge stick is fully extinguished before leaving it unattended.
- Extinguish with water: If you need to extinguish the smudge stick quickly, gently press the lit end into a small bowl of water. This will immediately extinguish the flame and the smoke. Be careful not to submerge the entire smudge stick in water, as this can damage it.
- Safety precautions: Always use caution when handling a smudge stick that has been recently burned. Allow it to cool down completely before touching or storing it. Make sure to properly dispose of any ashes or remnants in a safe and responsible manner.
Remember, the act of smudging is a personal and spiritual practice. It’s important to approach it with reverence and respect. By following these guidelines for lighting and extinguishing a smudge stick, you can ensure a safe and enjoyable experience. Happy smudging!
As a table, here is a simple for lighting and extinguishing a smudge stick:
| Steps | Lighting the Smudge Stick | Extinguishing the Smudge Stick Safely |
|---|---|---|
| 1. Prepare your space | ||
| 2. Use a flame source | ||
| 3. Safety precautions | ||
| 4. Intentions and prayers | ||
| 5. Smudging technique | ||
| 6. Allow it to burn out naturally | ||
| 7. Extinguish with water | ||
| 8. Safety precautions |