Inflating a yoga ball is easy when you follow this . From preparing the ball to securing the valve, learn how to properly inflate and store your yoga ball for your next workout.
Materials Needed for Inflating a Yoga Ball
In order to successfully inflate a yoga ball, you will need a few essential materials. Let’s take a look at each one:
Yoga Ball
The first and most important item you will need is, of course, the yoga ball itself. The yoga ball, also known as an exercise ball or stability ball, is a versatile piece of equipment that can be used for various exercises and stretches. It is made of a durable and flexible material, typically PVC, that allows it to withstand the weight and pressure applied during workouts.
When choosing a yoga ball, it’s important to consider the size that is suitable for your height and exercise needs. Yoga balls come in different diameters, ranging from 45cm to 85cm. To determine the right size for you, it is recommended to refer to a size chart that correlates ball size with your height. Selecting the appropriate size will ensure optimal comfort and support during your workouts.
Air Pump
The next essential item you will need is an air pump. An air pump is used to inflate the yoga ball by pumping air into it. There are various types of air pumps available, including manual pumps and electric pumps. Manual pumps require physical effort to pump air into the ball, while electric pumps operate with the push of a button, making the inflation process quicker and easier.

When choosing an air pump, it’s important to consider the type of valve on your yoga ball. Some yoga balls have a standard valve, while others may have a specialized valve. Make sure to select an air pump that is compatible with the valve on your yoga ball to ensure a secure and efficient inflation process.
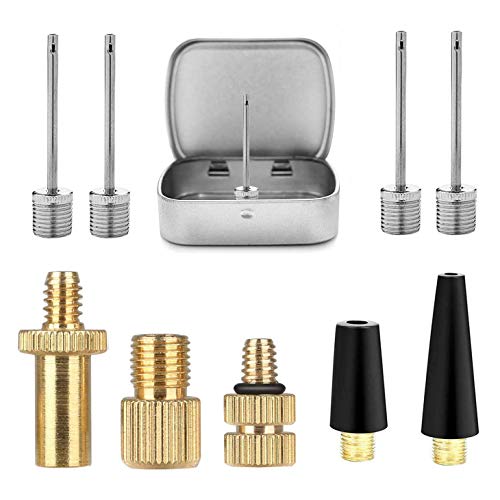
Needle Adapter
The last material you will need is a needle adapter. The needle adapter is a small attachment that connects the air pump to the yoga ball. It is designed to fit into the valve of the yoga ball, allowing the air to flow from the pump into the ball.
The needle adapter is a crucial component as it ensures a proper seal between the pump and the ball, preventing any air leakage during the inflation process. It is important to check that the needle adapter is firmly attached to the air pump before proceeding with inflation.
To summarize, the materials needed for inflating a yoga ball include the yoga ball itself, an air pump, and a needle adapter. These essential items will enable you to properly inflate and enjoy the benefits of your yoga ball. Now that we have covered the necessary materials, let’s move on to the next section where we will discuss how to prepare the yoga ball for inflation.
Preparing the Yoga Ball for Inflation
Remove the Ball from Packaging
When you first receive your yoga ball, it will usually come packaged tightly. Carefully remove the ball from its packaging, being mindful not to damage the ball or the valve in the process. Take a moment to inspect the ball for any visible defects or damage before proceeding with the inflation process.

Identify the Valve
Before you can begin inflating your yoga ball, it’s essential to locate the valve. The valve is a small opening on the ball where the air will be pumped in. It is typically located near the top of the ball, but the exact position may vary depending on the brand and model. Look for a small, round opening with a plastic or rubber flap covering it.
Check for Any Damage
Once you have located the valve, take a moment to inspect the ball for any signs of damage. Look for punctures, tears, or any other visible issues that could affect the ball’s integrity. It’s crucial to ensure that the ball is in good condition before inflating it to avoid any potential accidents or leaks. If you notice any damage, it is best to contact the manufacturer or retailer for assistance or to arrange a replacement.
Inflating a yoga ball is a straightforward process, but it’s essential to follow the correct steps to ensure proper inflation and avoid any mishaps. By preparing the ball for inflation correctly, you can enjoy a safe and effective workout experience.
Now that you have removed the ball from its packaging, identified the valve, and checked for any damage, you are ready to proceed with the next steps of attaching the needle adapter and inflating the yoga ball.
Attaching the Needle Adapter
When it comes to inflating a yoga ball, one of the key steps is attaching the needle adapter to the air pump. This small but crucial piece allows you to pump air into the ball effectively. In this section, we will guide you through the process of attaching the needle adapter with easy-to-follow steps.
Insert the Needle Adapter into the Air Pump
To begin, take the needle adapter and insert it into the air pump. The needle adapter is a small, cylindrical piece that is designed to fit into the nozzle of the air pump. It may have a thread-like texture on the outside, which helps to create a tight seal when attached to the pump.
When inserting the needle adapter, make sure it is fully inserted into the pump’s nozzle. You may need to apply a bit of pressure to ensure a secure connection. Once inserted, give it a gentle twist to lock it in place. This will prevent any air leakage during the inflation process.
Align the Needle Adapter with the Valve
With the needle adapter securely attached to the air pump, it’s time to align it with the valve on the yoga ball. The valve is the small opening on the ball where the air will enter. It is usually located near the top or bottom of the ball.
To align the needle adapter with the valve, hold the pump in one hand and the ball in the other. Position the needle adapter close to the valve, making sure they are in line with each other. Take a moment to visually confirm that the needle adapter is centered and directly facing the valve. This alignment will ensure that the air flows smoothly into the ball without any obstructions.
Once you have aligned the needle adapter with the valve, you are ready to move on to the next steps of inflating the yoga ball. But before we proceed, let’s recap what we’ve covered so far:

- Insert the needle adapter into the air pump, ensuring a secure connection.
- Align the needle adapter with the valve on the yoga ball, making sure they are centered and facing each other.
Now that you have successfully attached the needle adapter, it’s time to move on to the next phase – inflating the yoga ball. This is where the real action begins as you watch your ball come to life. In the following section, we will guide you through the process of inflating the ball while ensuring optimal firmness and size.
Inflating the Yoga Ball
Begin Pumping Air
So, you’ve just purchased a brand new yoga ball and you’re excited to start incorporating it into your fitness routine. The first step in inflating your yoga ball is to begin pumping air into it.
To do this, you’ll need an air pump, which we will discuss in more detail later. Once you have your air pump ready, make sure you have the needle adapter attached securely. This is important because without the needle adapter, you won’t be able to inflate the ball.
Once the needle adapter is attached, start pumping air into the ball. Use a steady, consistent motion to ensure that the air is evenly distributed throughout the ball. It’s important not to rush this process, as inflating the ball too quickly can lead to uneven firmness.
Monitor the Ball’s Size
As you pump air into the yoga ball, it’s essential to keep an eye on its size. The ball will start to expand and take shape, and you’ll want to ensure that it inflates to the appropriate size for your needs.
To monitor the ball’s size, take a step back and observe its progress. Is it inflating evenly? Are there any areas that seem to be expanding more quickly than others? These are important questions to consider as you continue to pump air into the ball.
Inflate to Desired Firmness
Once the yoga ball has reached an appropriate size, it’s time to focus on achieving your desired firmness. This will depend on your personal preferences and the intended use of the ball.
To find the right level of firmness, give the ball a gentle squeeze. Is it too soft and squishy? If so, continue pumping air until it reaches the desired level of firmness. On the other hand, if the ball feels too hard, you can release some air by gently pressing on the valve to let out a small amount of air.
Remember, finding the perfect firmness is a matter of personal preference. Some people prefer a softer ball for exercises that involve sitting or lying down, while others may prefer a firmer ball for more intense workouts or balance exercises.
Inflating your yoga ball to the appropriate size and firmness is essential for maximizing its benefits and ensuring your safety during exercises. By following these steps, you’ll be well on your way to enjoying the many benefits that a yoga ball can bring to your fitness routine.
- Pump air into the ball using a steady, consistent motion.
- Monitor the ball’s size as it inflates to ensure even expansion.
- Inflate the ball to your desired level of firmness, considering your personal preferences and intended use.
Remember, take your time and enjoy the process of inflating your yoga ball. Happy exercising!
Removing the Needle Adapter
Release the Air Pressure
Before removing the needle adapter from the valve of your yoga ball, it is important to release the air pressure. This step ensures that you can safely detach the adapter without any sudden bursts of air. To release the air pressure, simply press down on the valve with your finger or use a small tool to gently push it open. This will allow the air to escape slowly and steadily. By taking this precaution, you can avoid any potential accidents or injuries that may occur if the air is released too quickly.
Remove the Needle Adapter from the Valve
Once the air pressure has been released, you can proceed to remove the needle adapter from the valve. This step is necessary to detach the pump from the yoga ball and complete the inflation process. To remove the needle adapter, simply twist it counterclockwise while pulling gently. The adapter should come out smoothly without any resistance. If you encounter any difficulty, make sure that the air pressure has been completely released and try again.
To ensure a proper removal, it is crucial to handle the needle adapter with care. Avoid applying excessive force or twisting too forcefully, as this may cause damage to the valve or the adapter itself. By using a gentle yet firm approach, you can safely detach the needle adapter without any issues.
Once the needle adapter has been removed, you can store it in a safe place for future use. It is recommended to keep it in a small container or pouch to prevent it from getting lost or damaged. By properly storing the adapter, you can ensure that it remains in good condition and ready for the next time you need to inflate your yoga ball.
Summary
In this section, we discussed the process of removing the needle adapter from the valve of your yoga ball. It is crucial to release the air pressure before attempting to detach the adapter to avoid any sudden bursts of air. By gently pressing down on the valve, you can release the air slowly and safely. Once the air pressure has been released, you can proceed to remove the needle adapter by twisting it counterclockwise. Remember to handle the adapter with care and store it in a safe place for future use. With these steps, you can successfully remove the needle adapter and complete the inflation process of your yoga ball.
Securing the Valve
Close the Valve Properly
When it comes to securing the valve of your yoga ball, it’s important to ensure that it is closed properly to maintain the ball’s inflation. Closing the valve is a simple but crucial step in the process of using a yoga ball.
To close the valve properly, you need to make sure it is fully sealed. This can be done by turning the valve clockwise until it is tight. It’s important to check that the valve is tightly closed to prevent any air from escaping.
One way to ensure that the valve is closed properly is by gently pushing down on the valve after you have tightened it. If you feel any air escaping or hear a hissing sound, it means that the valve is not closed tightly enough. In this case, you should continue turning the valve until it is completely sealed.
Check for Any Leaks
After you have closed the valve properly, it’s important to check for any leaks in your yoga ball. This step is crucial to ensure that your ball remains properly inflated and doesn’t lose air over time.
To check for leaks, you can perform a simple test. First, fully inflate your yoga ball and close the valve tightly. Then, observe the ball for any signs of deflation. If you notice that the ball is losing air or becoming noticeably softer, it could indicate a leak.
To locate the source of the leak, you can try submerging the ball in water and looking for bubbles. Alternatively, you can use a soapy water solution and apply it to the surface of the ball. If there is a leak, you will see bubbles forming at the site of the leak.
Once you have identified a leak, you can use a patch kit to repair it. Patch kits typically include adhesive patches that can be applied to the damaged area to seal the leak. Follow the instructions provided with the patch kit to properly repair the leak.
Regularly checking for leaks is important to ensure the longevity and functionality of your yoga ball. By promptly addressing any leaks, you can maintain the proper inflation and stability of the ball, allowing you to use it for various exercises and activities.
Storing the Yoga Ball
Deflate the Ball
To properly store your yoga ball, it is important to first deflate it. Deflating the ball not only makes it easier to store, but it also helps to prolong the life of the ball. To deflate the ball, follow these simple steps:
- Locate the valve on the yoga ball. The valve is usually located near the top of the ball and is typically made of rubber.
- Using your fingers, gently press down on the valve to open it.
- Allow the air to slowly escape from the ball. You may hear a hissing sound as the air is released.
- Continue pressing down on the valve until all the air has been expelled from the ball.
- Once the ball is completely deflated, release your fingers from the valve to close it.
By deflating the yoga ball before storing it, you are able to reduce the amount of space it takes up, making it easier to store in a small bag or container. Deflating the ball also helps to prevent any damage that may occur if the ball is accidentally punctured while in storage.
Place in Storage Bag or Container
After deflating the yoga ball, the next step in the storing process is to find a suitable storage bag or container. This will help to protect the ball from any dust or dirt that may accumulate while in storage. Here are some options for storing your yoga ball:
- Storage Bag: Many yoga balls come with their own storage bag, which is specifically designed to fit the deflated ball. These bags are often made of durable material and have a drawstring or zipper closure to keep the ball securely inside.
- Large Container: If you don’t have a storage bag, you can also use a large plastic container with a lid. Make sure the container is clean and dry before placing the deflated ball inside. This will provide a protective barrier from any potential damage.
When placing the deflated yoga ball in the storage bag or container, make sure to carefully fold or roll the ball to avoid any unnecessary strain on the material. This will help to prevent any tears or punctures from occurring during the storage period.
Remember to keep the storage bag or container in a cool, dry place to further protect the yoga ball from any damage. Avoid storing the ball in direct sunlight or in areas with high humidity, as this can cause the material to deteriorate over time.
By following these steps to deflate and store your yoga ball, you can ensure that it remains in good condition and ready for use the next time you need it. Proper storage not only helps to prolong the life of the ball, but it also makes it easier to keep your yoga equipment organized and accessible.
Now that you know how to store your yoga ball, let’s move on to the next section to learn how to properly inflate it when you’re ready to use it again.