Break up fascial adhesions at home with the right techniques and tools. Learn how to release tension and improve flexibility and range of motion with self-myofascial release methods.
Understanding Fascial Adhesions
What are Fascial Adhesions?
Fascial adhesions are a common phenomenon that can have a significant impact on our bodies. So, what are they? Simply put, fascial adhesions are areas of scar tissue that form within the fascial network, a complex web of connective tissue that surrounds and supports every muscle, bone, and organ in our body. These adhesions occur when there is inflammation or trauma to the tissues, causing them to stick together in a way that can affect movement, flexibility, and even overall health.
You can think of fascial adhesions like a knot in a rope. When a rope becomes tangled or knotted, it can restrict its natural flow and movement. Similarly, fascial adhesions can restrict the natural movement and flexibility of our bodies, leading to pain, stiffness, and limited range of motion.
How They Form and Affect the Body
But how do these adhesions form, and what effects do they have on our bodies? There are many ways that fascial adhesions can develop, including injuries, surgery, repetitive strain, and even just daily wear and tear on our bodies.
When fascial adhesions form, they can have a ripple effect throughout the body, causing a range of symptoms and problems. For example, a tight or adhesed fascial band around the hip may not only cause stiffness and pain in the hip itself, but also affect the movement and flexibility of the knee, ankle, and even the lower back.
The good news is that, with the right techniques and tools, it is possible to identify and break up these adhesions, restoring normal movement and flexibility to the body. And that’s where self-myofascial release comes in – a gentle, yet powerful way to release tension and restore balance to the fascial system.
Preparation for Self-Myofascial Release
======================================================
Before you start your self-myofascial release journey, it’s essential to prepare yourself and your environment. Think of it as preparing the soil for a beautiful garden – you want to make sure the foundation is solid, and the right conditions are in place for growth.
Choosing the Right Tools
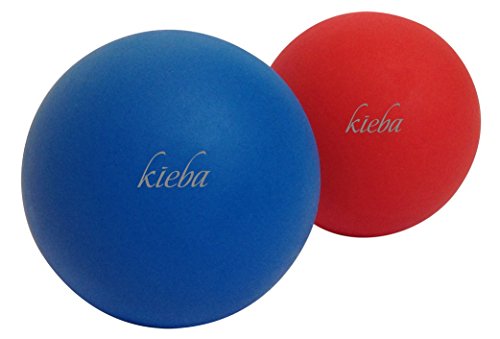
The first step in preparing is choosing the right tools for the job. When it comes to self-myofascial release, the most common tool is a foam roller or a lacrosse ball. But which one is right for you?

- Foam rollers are great for larger areas like the IT band, quadriceps, and hamstrings. They provide a softer, more gradual pressure that’s perfect for beginners or those with sensitive areas.
- Lacrosse balls are ideal for smaller areas like the shoulders, back, and glutes. They offer a more intense, targeted pressure that’s great for breaking up adhesions and scar tissue.
Consider your personal preferences and the specific areas you want to target when choosing your tool.
Creating a Conducive Environment
Now that you have your tool, it’s time to create a conducive environment for self-myofascial release. Think of it as creating the perfect atmosphere for a relaxing bath – you want to make sure you’re comfortable, relaxed, and able to focus.
- Find a quiet, private space where you can lay down or sit comfortably.
- Choose a surface that’s firm but not too hard, like a yoga mat or a soft carpet.
- Adjust the lighting to a comfortable level – dim or soft lighting can help you relax.
- Consider playing calming music or a guided meditation in the background.
- Take a few deep breaths, and get into a comfortable position – your body and mind are ready to start your self-myofascial release journey!
Techniques for Breaking Up Fascial Adhesions
Fascial adhesions can be a real pain (literally!), but fear not, dear reader, for we have some techniques up our sleeves to help you break them up and regain your freedom of movement. In this section, we’ll dive into three techniques that are sure to become your new best friends: Lateral Line Release, T-Spine Technique, and IT Band Release.
Lateral Line Release
Are you aware that your body has meridians, or pathways, that run from head to toe? These pathways are called the Lateral Lines, and they play a crucial role in the flow of energy throughout your body. Well, when you get fascial adhesions, they can disrupt this flow, causing tension and restriction in your muscles. So, it’s essential to release these adhesions to restore balance and harmony. To do the Lateral Line Release technique:
- Start by finding the center of your body, just above your pubic bone.
- Place your fingers on this area and use your body weight to apply gentle pressure.
- Slowly walk your fingers along the Lateral Line, releasing any tension or adhesions as you go.
- As you release, imagine the energy flowing freely through your body, like water dripping from a faucet. Ah, doesn’t that feel good?!
T-Spine Technique
Imagine your neck and torso are a “T” shape. When you get fascial adhesions, this “T” can start to warp and twist, causing tension in your neck, shoulders, and upper back. The T-Spine Technique is designed to release these adhesions and restore the natural alignment of your spine. To do the T-Spine Technique:

- Sit or lie down comfortably, with your neck and shoulders relaxed.
- Use your fingers to locate the T-Spine, which is the area at the base of your neck.
- Gently apply pressure to this area, using your body weight to help release any tension or adhesions.
- As you release, imagine your “T” shape slowly returning to its natural position, like a puzzle piece snapping into place.
IT Band Release
Have you ever noticed that your legs and hips can feel stiff and sore after a long day of sitting or exercising? This could be due to fascial adhesions in the IT Band (Iliotibial Tract), a ligament that runs down the outside of your thigh from the hip to the knee. The IT Band Release technique is designed to target and release these adhesions. To do the IT Band Release:
- Sit on the floor with your legs straight out in front of you.
- Cross one leg over the other, so your ankle is resting on the opposite knee.
- Use your fingers to locate the IT Band, which is the bony prominence on the outside of your thigh.
- Gently apply pressure to this area, using your body weight to help release any tension or adhesions.
- As you release, imagine the adhesions melting away like ice cream on a hot day. Ah, bliss!
Common Areas to Target for Breakup
When it comes to self-myofascial release, understanding where to focus your efforts is crucial. Different areas of the body can harbor various levels of tension and adhesions, making it essential to target the right spots. Here are some common areas to focus on for breaking up fascial adhesions:
Neck and Shoulders
One of the most common areas to experience tension is the neck and shoulder region. This area is prone to strain from daily activities such as sitting at a desk, driving, or even sleeping. The neck and shoulders are made up of intricate layers of muscle and fascia, which can become stuck due to poor posture, injury, or repetitive motion.
When releasing the neck and shoulders, focus on the following areas:
- The suboccipital triangle, where the base of the skull meets the neck
- The trapezius muscle, which runs from the base of the skull to the shoulder blade
- The levator scapulae muscle, which connects the neck to the shoulder
Release these areas with a foam roller or your own body weight, slowly rolling over the affected areas to release tension and adhesions.

Hips and Glutes
The hips and glutes are another common area where fascial adhesions can develop. This region is susceptible to tension and strain from activities such as running, jumping, or even crossing your legs.
When releasing the hips and glutes, focus on the following areas:
- The piriformis muscle, which runs from the base of the spine to the thighbone
- The iliotibial (IT) band, which runs down the outside of the thigh from the hip to the knee
- The gluteal muscles, which make up the buttocks
Release these areas with a foam roller or your own body weight, slow rolling over the affected areas to release tension and adhesions.
Knees and Ankles
The knees and ankles are also common areas where fascial adhesions can develop. This region is susceptible to tension and strain from daily activities such as walking, running, or even squatting.
When releasing the knees and ankles, focus on the following areas:

- The iliotibial (IT) band, which runs down the outside of the thigh from the hip to the knee
- The patellar tendon, which connects the kneecap to the shinbone
- The ankle bone, which is susceptible to strain from repetitive ankle movements
Release these areas with a foam roller or your own body weight, slow rolling over the affected areas to release tension and adhesions.
Safety Considerations and Precautions
Fascial Release is an extraordinary technique that can bring about life-changing results, but it’s essential to approach it with caution and respect. As with any new activity, it’s crucial to prioritize safety and take necessary precautions to avoid any potential harm. In this section, we’ll explore the essential considerations to keep in mind when practicing Self-Myofascial Release to ensure a smooth and successful journey.
Avoiding Over-Release
One of the most common mistakes when practicing Self-Myofascial Release is over-releasing, which can lead to discomfort, pain, or even injury. It’s essential to maintain a gentle and controlled approach, focusing on gradual and subtle releases rather than aggressive or forceful ones. Think of it like when you’re untangling a knot in a rope – you wouldn’t yank it or pull it too hard, would you? Instead, you’d work slowly and patiently to release the tension. When applied to fascial release, this approach helps prevent damage to the surrounding tissues and ensures a more effective release.
Protecting Vulnerable Areas
Some areas of the body are more prone to vulnerability than others. When working on these regions, it’s crucial to exercise extra caution and protect the delicate tissues. For example, the eye area, neck, and temple zone are susceptible to injury if not approached carefully. When working on these areas, use a gentle and precise touch, avoiding any sudden or rough movements. You can also consider using a foam roller or ball with a softer texture to minimize the risk of discomfort or pain.
Managing Pain and Discomfort
It’s normal to experience some level of discomfort or pain when releasing fascial adhesions, especially if you’ve been carrying tension for an extended period. However, it’s vital to recognize the difference between tolerable discomfort and debilitating pain. If you experience sudden, sharp, or severe pain, halt the release immediately and reassess your approach. You can also adjust your breathing, relax your muscles, or try some gentle stretches to reduce the discomfort. Remember, the goal is to release tension, not to cause more harm. By being mindful of your body’s signals and adapting your approach accordingly, you’ll be able to navigate any minor discomforts and achieve optimal results.